Buttonholes and More Trim
Buttonholes and More Trim
 Although many machines can sew acceptable buttonholes, there is nothing like a handworked buttonhole to distinguish a garment as couture. Now for the good and the bad. The good thing about making buttonholes by hand is there is one basic stitch and you simply repeat it over and over. The bad is that it takes hours, and hours, and hours of practice to get the stitches narrow and evenly spaced with just the right tension.
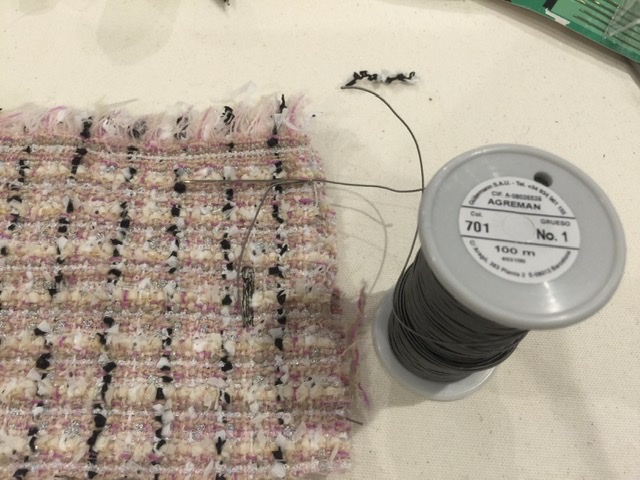
There are a few hints that can make this process easier. Using professional materials does make a difference. After making hundreds of buttonholes I’ve found there really is no substitute for Gutermann gimp. It’s not easy to find outside of professional tailoring suppliers but it makes a tremendous difference in the quality of the finished buttonhole.
Gimp is a stiff cord that lifts the stitches off the surface of the cloth and gives a smooth surface for the buttonhole stitches to sit on. Silk buttonhole twist also comes in various weights. The thicker size F is easier to work with and requires fewer stitches but produces a bulkier buttonhole. My preference is Gutermann R753 which is just a bit thinner and makes a finer buttonhole.
Cutting the buttonhole is also easier with a couple of tools. I found an antique buttonhole cutter which cuts the circular hole and slit in one step. This probably isn’t sharp enough to use.
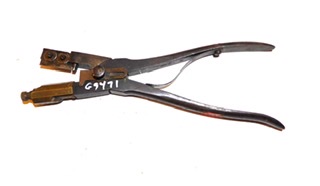
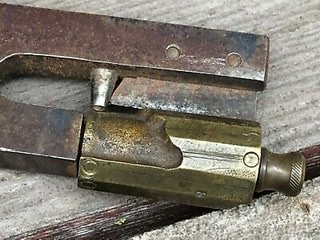
What works for me is a sharp hollow punch for the keyhole and a chisel for the slit.


To actually make this buttonhole first carefully mark where you want the buttonhole and baste all the layers of fabric together. This prevents things from shifting around while you are working. I forgot to take a photo of just the basting so this photo shows the buttonhole cut. Blue thread is the basting.

Before cutting anything (this is especially useful if you’re working on a loosely woven boucle type fabric) machine stitch around the buttonhole. I run two rows of stitching using about a 0.8 to 1.0 mm stitch. The machine stitching will really hold everything in place.

How’s the time to cut. Unlike machine buttonholes which are cut after stitching, the handworked buttonhole is cut first. I use the hole punch pliers to cut a clean hole. Then carefully place the appropriate size chisel along the center of the buttonhole and tap the chisel a few times with a hammer. I use thick cardboard or a piece of heavy scrap leather underneath both the hole punch and chisel to prevent damage to the tools.
I prefer the look of a teardrop shaped buttonhole so I carefully trim away the little triangles at the base of the circular hole.
I begin stitching the buttonhole with the rounded end away from me and begin work on the left side. Thread the gimp on a large eye needle, put it between the fabric layers and bring it up just inside the cut edge. Wax and press the buttonhole twist. Rule of thumb is that 1 yard of twist for 1 inch buttonhole. Stitches are worked by inserting the needle about 1-2 mm from the cut edge. Wrap the thread in the direction you are sewing; in this case I’m wrapping the thread around the needle clockwise. Pull the thread through and upwards forming the purl knot on the top edge. Using a traditional tailor’s thimble is helpful to control your needle and place the stitches accurately. Putting you left thumbnail where you want the needle to exit the fabric also helps. You want the stitches almost touching but not crowded. Practice definitely helps. Your 10th buttonhole will look much better than the first and number 100 even better.


Work up the left side, fan the stitches around the circular end and down the right side. Turn the cloth so you are always making the same stitch from the same position. The cloth moves, your hands and stitches don’t. Bend the gimp around the buttonhole as you work.

When you get back to where you started pass the gimp between fabric layers and cut it off. Take three stitches across both sides of the buttonhole with the silk twist and bury the thread. Baste the edges of the buttonhole together and use a bodkin to shape the end into a nice circular shape. Press and leave the basting in place until the garment is finished.
In my quest to replicate Chanel jackets, I did a little sleuth shopping. These are from the new spring cruise collection. Looking at the price tags, I’m happy to be creating my own.
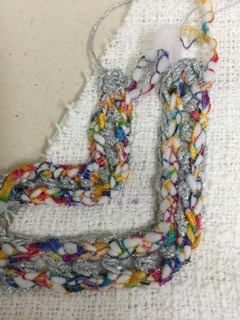
The trim was what I was most interested in. I’ve managed to create a fairly good duplication and am working on refining and variations.
Here’s my version.
Buttonholes, advanced garment shaping using ironwork, Chanel style trims and more in a French jacket class, Palm Beach Gardens, FL February 10-15. Only 2 spots left; more classes coming. Dates to be announced.

