French Jacket: The Details
French Jacket: The Details
In this post I’ll explore the seemingly little details will make your completed jacket look professional. I love the look of a patterned fabric perfectly matched across the seam lines. Here are the changes I make to the pattern. I also shape certain garment pieces using heat and steam.
A basic princess line pattern. I’ve drawn it on grid paper. It has been cut so that horizontal threads in the fabric match along the lower portion but look what happens in the upper chest area.
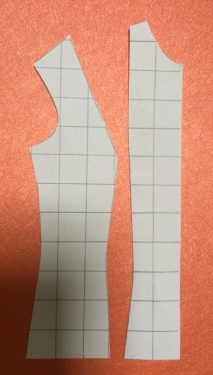

Here’s what happens if I’m able to manipulate the fabric in the side front.

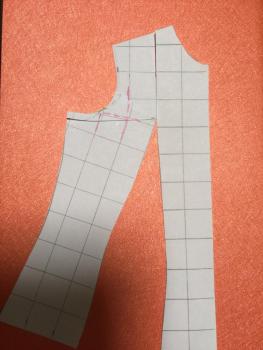
In order to minimize the amount of shaping required, I’ve shifted the front princess seam from the bust point upwards and brought it closer to the neck. The violet pattern shows the original; in the red I’ve shifted the princess seams (both front and back so they match at the shoulder) closer to the neck. Overlaying the patterns shows the changes. The same amount of fabric removed from both center fronts and backs has been added to the side back and fronts.


Here is an illustration done on a full figured model. The first photo shows the fabric without shaping. Second photo shows how the fabric pattern matches and gives a much less disruptive line.


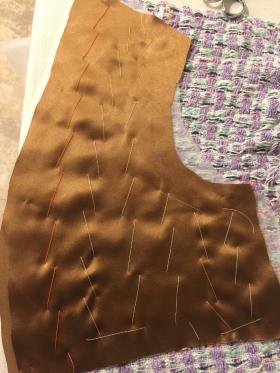
The ironwork does push a lot of fabric into the armseye area and makes the grain quite unstable. I deal with this by cutting a piece of silk organza using the original pattern and baste it in place. The armseye can be further stabilized by taping the seamline. The lining is cut according to the pattern and basted in place before quilting (this is a sample and the lining wouldn’t stop below the armhole).

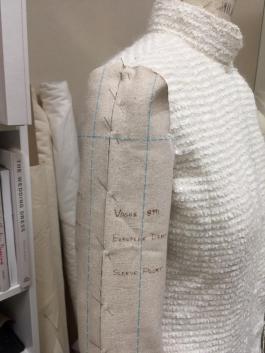
Here’s the front of my white jacket. I’ve moved the princess seam and manipulated the fabric. The horizontal lines in the weave are continuous. I’ve chosen to add a standup collar. It is also cut as a straight piece and shaped with the iron. Cardboard cut to the shape and size of the finished collar helps press a smooth curve and keeps both sides identical.


An easy way to match the fabric design when cutting sleeves is to pin the muslin sleeve onto the jacket body. Pin scraps of fabric to the muslin sleeve, matching the fashion fabric along seam lines. Remove the muslin sleeve, lay it flat keeping the scraps of fashion fabric in place. Carefully trim along the seam lines. Now you have an exact guide to cut the sleeves and be sure they will match. The sleeves should be mirror images of each other but check to be sure.


Next I’ll tackle handworked buttonholes. If you would like hands-on instuction, I’m teaching a French jacket class in Palm Beach Gardens, FL from February 10-15, 2020. We’ll cover fitting, ironwork using professional equipment, jacket construction, custom trims, handworked buttonholes and more. If you’re interested, leave your contact info and I’ll send further details.